
This tutorial is a fun weekend project. My intention is to spark your imagination, hone your photographic and lighting skills and for you to get some great shots for your portfolio. With all the long weekends during April, I decided to put this tutorial together. This is a typical college project, where you will be able to get fantastic results with minimum input.
Step 1 GEAR
- Your digital camera set at manual F 8, Shutter 1/160 ISo 400 and set on raw.
- Tripod.
- Two Speedlights set on manual and its lowest power setting.
- Some form of stand or support for the two speed lights.
- One sender and two receivers to trigger your flash system.
- A black and/or white background. Project board from the local stationery supply store will be sufficient.
- A fish tank. 60 x 32 x 32 cm’s will be sufficient, filled up to about 75% with water.
- A small piece of duct tape.
- Two plastic bags, to cover your speed lights. There will be a lot of splashing.
- Things to drop into the water. I used papers and a lemon, got excited and even used a camera. Open up the imagination on this one.
- A very dark location, and if this is impossible, you will have to do this project at night when it is possible to darken a room.
- A cloth or squeegee, to clean the inside and outside off the front of the water tank, in between shots.
Step 2 SETUP
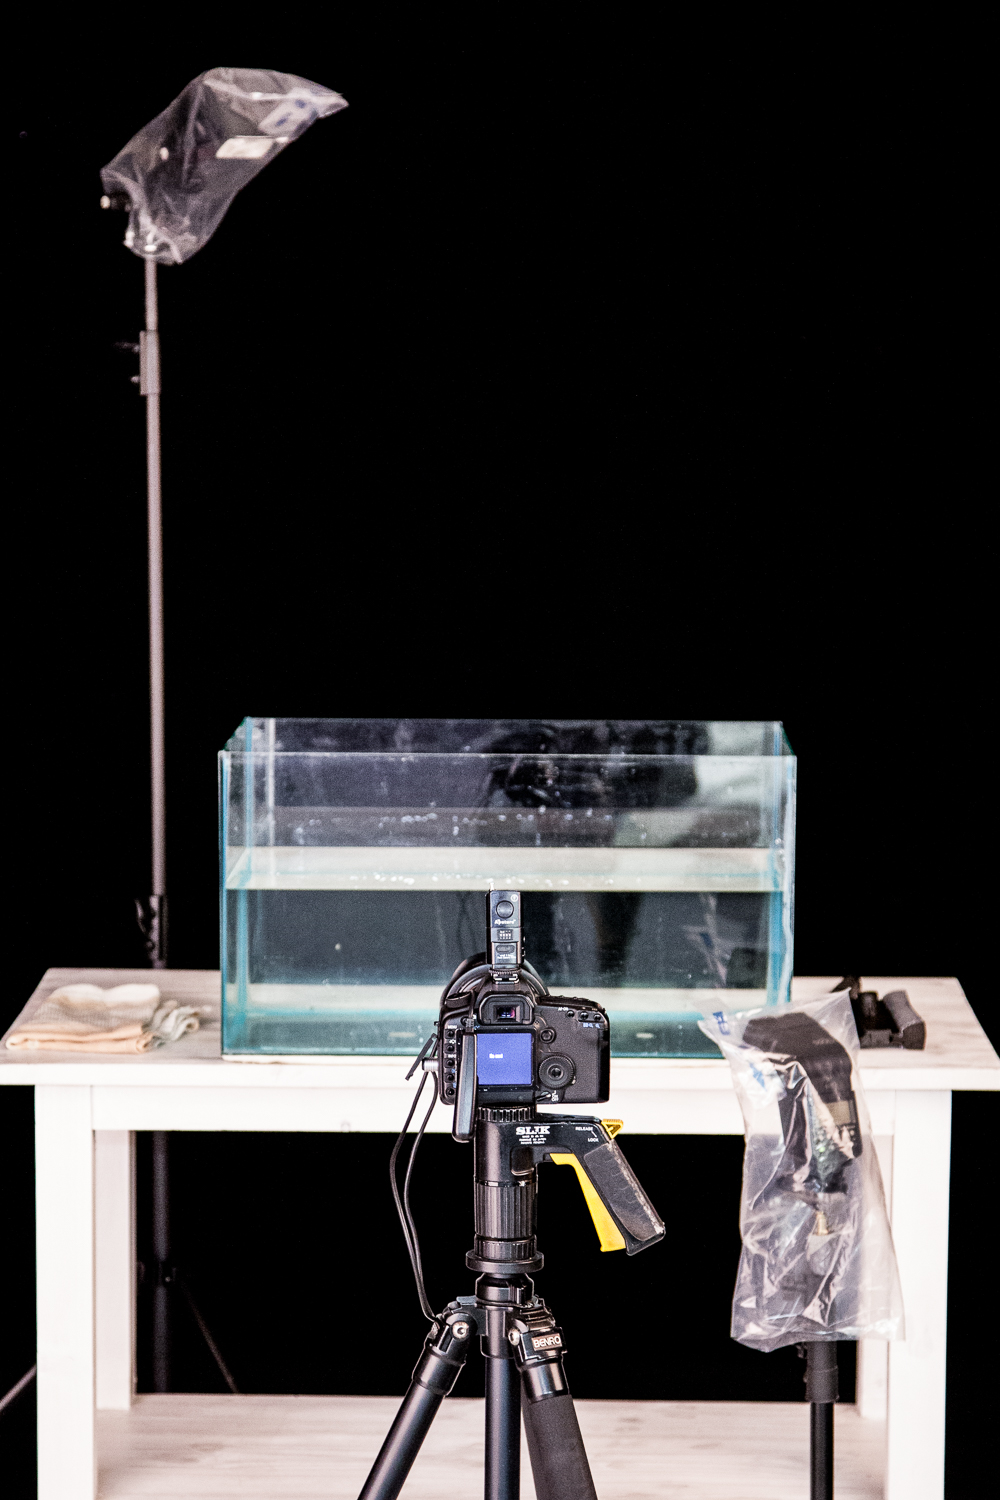
In the setup picture it is easy to see how I have put it together. The camera is on a tripod aimed at the water tank about three quarters of a metre away. The water level sits on the top third line of my composition. On the right, from a low angle, I have one speed light and from the top, and a high angle, I have the other speed light. With this setup there is enough light to highlight the splashing of the water at the top, as well as exposing the colourful objects itself. You will have to play around with the specific angles of the Speedlights in order not to get reflection of the surface of the water tank. The plastic bags over the Speedlights are absolutely essential for obvious reasons. My camera was set up with the above settings for a very specific reason. The fairly high ISO value was set to accommodate the very low intensity settings on the Speedlights. The principle being that the smaller the intensity of the flash, the shorter the flash duration, and therefore much more freezing power to render the splashing and droplets of water sharp.
Step 3 WORKFLOW

The camera needs to be pre-focused. The reason being that the auto-focus system will be too slow to get good focus during the fast action. You have to place something or hold something inside the water tank and then use your auto-focus system to get sharp focus. In my case I decided to switch the auto-focus function off and stick a small piece of duct tape on the lens to ensure that the focus don’t shift during the shoot. Make sure that you remove this piece of duct tape before you switch the auto-focus system back on again. You also have to use a remote or cable release in order to be able to take the picture whilst dropping things into the water. Do your first run and have a look at the exposure. If the image is a little bit too dark, you have two options. You can increase the intensity of your speed lights, with the danger of paying a price on the flash duration, softening up the image a bit, or you can increase your ISO value, to bring the setup into exposure, with the possibility of losing quality, depending on what camera you use. I managed to achieve a happy balance at ISO 400 and the Speedlights at 1/64 of their full power setting. I started out with a black background but got bored very fast, because I realised that I have seen a lot of these pictures on the Internet against black and hardly any against white. I then used a white background, pointing a third light at the white background and overexposing the background completely in relation to my setup. The white background was about 1.5 m behind the setup, to make sure that I don’t get any tenting effect from it. I triggered this third light through an optical receiver, with the power setting two stops above the other Speedlights. I could do this, because it’s only function is to overexpose the background and no freezing power was needed from this unit. With the setup tested and working, the fun can start. Shoot and drop, working out the perfect timing, clean the front panel of the tank, and repeat. It is now essential to carry on with this process until you have nailed a couple of good pictures.
Step 4 EDITING
I used Lightroom 5 to sort out the pictures and make my final selections. Basic editing was added, specifically cropping, tonal adjustments, clarity and sharpening. I then exported my images to Photoshop to clean up the background’s and to do an interesting composite of the peppers. We teach you how to do these composites during the Photoshop 101 workshop presented by Digital Photography Courses.
Step 5 FINAL REMARKS
Don’t drop your objects from too high. The weight of your object will have an influence on the height that you can drop it from. The peppers I could drop from about 20 cm above the water level. The lemon I had to drop from about 10 cm and the camera, because it is quite heavy, I could only drop from about 5 cm, and to play it safe I had cloth at the bottom of the tank to absorb the camera hitting the bottom. Can you imagine the mess if the water tank breaks? Have fun with this project and I would love to see your end results. Feel free to upload it on Photo Critic, for a critique.
